Showing posts with label Food. Show all posts

Tuesday, June 26, 2012

Grilling does NOT defeat me!


Despite my inexperience to grilling, after the success I had with grilling for father's day, I gave it a shot here in Ames. Everything turned out delicious! (So delicious, I almost didn't use a fork!)


Onions, Stew Meat, and Mushrooms covered with some soy sauce and salt and cooked over hot coals are scrumptious. Add to that fresh strawberries and a cool summer brew and my evening outside was thoroughly relaxing. 


After spending the afternoon weeding around the house and cleaning out the garage, the break was definitely appreciated.

Tomorrow looks to be a scorcher, so I'm planning to cool off with a little floating. Better than paying for air conditioning, right?

Wednesday, June 13, 2012

Easy Spinach Quiche

 One of the meals I began to enjoy in high school was quiche, especially spinach quiche. My mom didn't make it very often, but I loved it whenever she did. Since spinach always seems to sour more quickly than I can eat it, I decided to use some of the spinach to make quiche! It's an easy recipe that didn't take very much work, and tasted delicious!

Spinach Quiche
  • 1 pie crust 
  • 1 (10 ounce) package frozen chopped spinach, thawed and drained - or 1 pound fresh spinach, cleaned and torn in small pieces
  • 1 onion, chopped
  • 2 tablespoons olive oil
  • 4 eggs
  • 1-1/2 cups skim milk
  • 1/2 teaspoon salt
  • 1/4 teaspoon pepper
  • 1/8 teaspoon ground nutmeg
  • 1 cup shredded chedder cheese
Begin by baking the crust. I make a homemade crust of oil, flour and water, and just patted it into the pan instead of rolling it out. 
It doesn't look quite as pretty, but it still tastes fine!
Preheat the oven to 400°F. Fit the crust to a 10 inch tart pan, cutting off the excess with a rolling pin. 
Bake for 10 minutes or until golden brown. Remove from the oven and let cool for 10 minutes.
Meanwhile, heat the olive oil in a medium skillet on medium heat. 
Add the chopped onion and cook stirring occasionally until the onion softens - about five minutes. 
Cut up the spinach into bite size pieces. 
Add the thawed and drained spinach (or torn fresh spinach)and cook just until the spinach wilts and any liquid has evaporated. Remove from heat and allow to cool.
In a mixing bowl, whisk together the eggs, crème fraîche, salt, pepper, and nutmeg just until homogenous. 
Stir in the cheese.... (I switched to a bigger bowl)
.... then cooled spinach and mix well. 
Pour the mixture into the cooled tart crust. 
 Bake in 375°F oven for 40 minutes.
I had a little extra, and put it into another pie pan without a crust.
 This recipe is packed with protein and delicious greens, and a great help for anyone with low iron (Hooray spinach!)
I added some strawberries to my supper meal, and even had a second piece it was just as delicious.

I got my recipe from here and modified it a little bit to fit my preferences

Spinach Quiche
  • 1 pan crust 
  • 1 (10 ounce) package frozen chopped spinach, thawed and drained - or 1 pound fresh spinach, cleaned and torn in small pieces
  • 1 onion, chopped
  • 2 tablespoons olive oil
  • 4 eggs
  • 1-1/2 cups crème fraîche (or heavy cream, half and half, or milk)
  • 1/2 teaspoon salt
  • 1/4 teaspoon pepper
  • 1/8 teaspoon ground nutmeg
  • 1 cup shredded gruyère cheese (or substitute)

DIRECTIONS

  1. Begin by blind baking the crust. Preheat the oven to 400°F. Fit the crust to a 10 inch tart pan, cutting off the excess with a rolling pin. Prick the bottom of the crust in about 20 places with the tines of a fork and place the pan in the freezer for 20 minutes. Once the crust is well chilled, remove it from the freezer and immediately place in the hot oven. Bake for 10 minutes or until golden brown. Remove from the oven and let cool for 10 minutes.
  2. Meanwhile, heat the olive oil in a medium skillet on medium heat. Add the chopped onion and cook stirring occasionally until the onion softens - about five minutes. Add the thawed and drained spinach (or torn fresh spinach)and cook just until the spinach wilts and any liquid has evaporated. Remove from heat and allow to cool.
  3. In a mixing bowl, whisk together the eggs, crème fraîche, salt, pepper, and nutmeg just until homogenous. Stir in the cheese and cooled spinach and pour the mixture into the cooled tart crust. Alternatively, you can layer the spinach and cheese in the tart crust before pouring the egg mixture on top.
  4. Bake in 375°F oven for 40 minutes.

Sunday, May 27, 2012

Royal Iced Sugar Cookies

My family has always used a buttercream frosting recipe to frost cakes and cookies. But after reading about royal icing on another blog, I wanted to try this beautiful way of decorating cookies that gives it a professional looking finish.

It will definitely take some additional practice, but for my first time, the cookies look pretty good!


Royal Icing
Ingredients:
4 cups powdered sugar, sifted
2 tbsp. meringue powder
5 tbsp. water 
 
Directions:
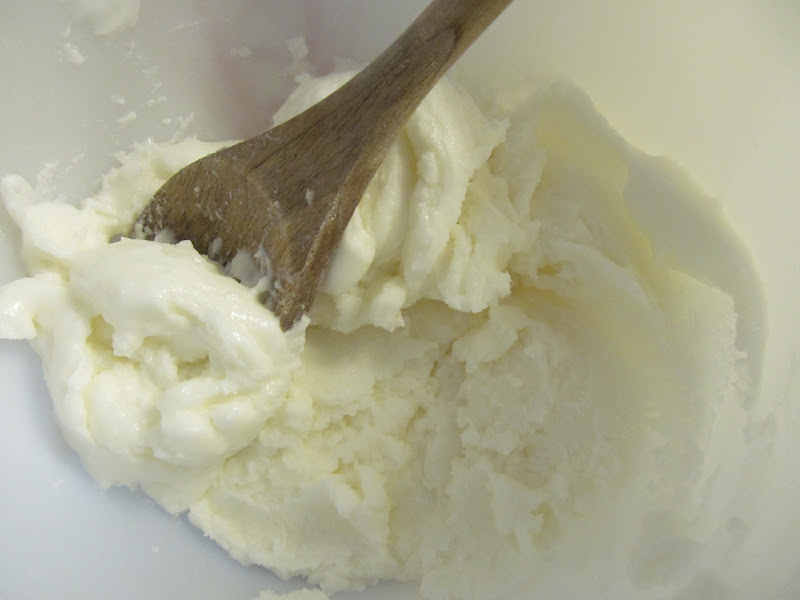
Combine all ingredients in the bowl of a stand mixer fitted with the paddle attachment.  Mix on low speed until the sheen has disappeared and the icing has a matte appearance (about 7-10 minutes).  Transfer the contents of the mixing bowl to an air-tight container. 


This will be the stiffest consistency of the icing, and at this point it is still too stiff to use for decorating.  Add water a very small amount at a time and stir by hand until fully incorporated.  Continue until the icing has reached a consistency appropriate for piping. 


(Remember, if you are having any difficulty piping, it is still too thick.  Add a little more liquid and try again.) 


Using a pastry bag, pipe around the edges of each cookie.  Let stand so the icing will set.  Make sure to keep the leftover icing covered at all times when not in use so that it does not begin to harden.


Once all the cookies have been edged, transfer some of the remaining icing to a separate air-tight container.  Thin out by incorporating a small amount of water at a time, until the icing drips off the spoon easily when lifted and then smooths in with that still in the bowl.  If you go too far and the icing is too thin, add more sifted powdered sugar to thicken it again. 


Once the icing has reached the desired consistency, transfer it to a squeeze bottle (or a plastic bag with a hole in one corner), and flood the area surrounded by the piping on each cookie.  If it does not completely spread to the edges, use a toothpick to help it along.  Allow to set.


Use the remaining thicker icing for piping decoration as desired.  Gel icing color is best as it does not add a significant amount of liquid.  Liquid food coloring can be used as well – add powdered sugar as needed to compensate for any thinning that occurs.

Recipe and additional frosting instructions fond on Annie's Eats 

I'm excited to try these out again for a party or for holiday gifts! 

Thursday, May 24, 2012

Shrimp Penne A La Besty

Back when I turned 22, I received two awesome gifts from my family: Tangled (one of my favorite movies in all it's animated, musical, quirky glory) and The Pioneer Woman Cookbook. I've been a follower of Ree Drummond's blog, and I love her book!


To this point, I haven't actually made anything out of the cookbook. Sure, I spend several day reading through and imagining what some of the dishes would take like, but due to lack of time, the size of the dishes, or an unknown phonemona that sent me back to mac n' cheese, I never tried a recipe.

Until Monday

On Monday, I decided to try a recipe that Ree's sister Betsy makes. (And yes, it has taken me four days to actually get this posted. Fail, I know. It's still yummy as leftovers though!)

And I think it turned out pretty well. It's not too heavy, easy to re-heat, and filling, especially with a side salad and milk!


Shrimp Penne A La Besty

1 lb penne pasta
1 lb large shrimp
2 Tablespoons Butter
2 Tablespoons Olive Oil
1 small onion, finely chopped
2 garlic cloves, finely chopped
1/2 cup dry white wine (optional)
one 14.5 ox can tomato sauce
1 cup heavy cream ( I used skim milk to make it a little healthier, and added some flour for thickening)
Milk for thinning
1/4 cup chopped flat leaf parsley
6 basil leaves, cut in chiffonade
Salt
Pepper

1. Cook pasta as directed in lightly salted pot of water.
2. Peel and de-vein shrimp and rinse under cold water.
3. In a small skillet over medium-high heat, add 1 tablespoon of the butter and 1 tablespoon of the olive oil.


4. When the pan is hot, add the shrimp. Stir and cook on both sides until it is just starting to turn opaque, about 2 minutes.
5. Remove shrimp to a plate and allow to cool slightly.
6. Next, finely chop the onion (and the garlic!)


7. In a large skillet over medium heat, add 1 tablespoon of butter and 1 tablespoon of olive oil.
8. Add the garlic and onion. Stir to combine and cook, until the onion is translucent, about 3 minutes.


9. Here, Ree recommends a sip of the wine, "if you're into that sort of thing"
10. Pour the rest of teh wine into the pan. Stir and allow if to evaporate, about 45 seconds.
11. Pour in the tomato sauce and stir to combine. Reduce heat to low.


12. Pour in the cream and stir well to combine. Reduce heat to simmer.
13. Return to the shrimp and remove the tails. Cut the shrimp into medium sized pieces and add to the sauce, stirring gently to combine.
14. Next, add the herbs and stir.


15. Add in the cooked and drained penne noodles. Stir gently to coat noodles evenly. Add salt and black pepper to taste.
16. Serve and enjoy (with french bread or a salad!)


Tuesday, May 15, 2012

Got Enough Rhubarb?

When I was younger, I remember watching my Mom cut up rhubarb.
Not that I ever ate any of the rhubarb. 
It was always much too sour for me as a child. 


However, now that I've gotten older, I really appreciate rhubarb.
It's a favorite to use in pies, cakes, and other sweets. 


While I was home this past week, my mother mentioned that the rhubarb was going to seed, 
a sign that if I wanted some rhubarb this season, I'd better go get some.  
 
 Thankfully, we've got a great patch of rhubarb at the house, 
and another neighbor who was not using her rhubarb.


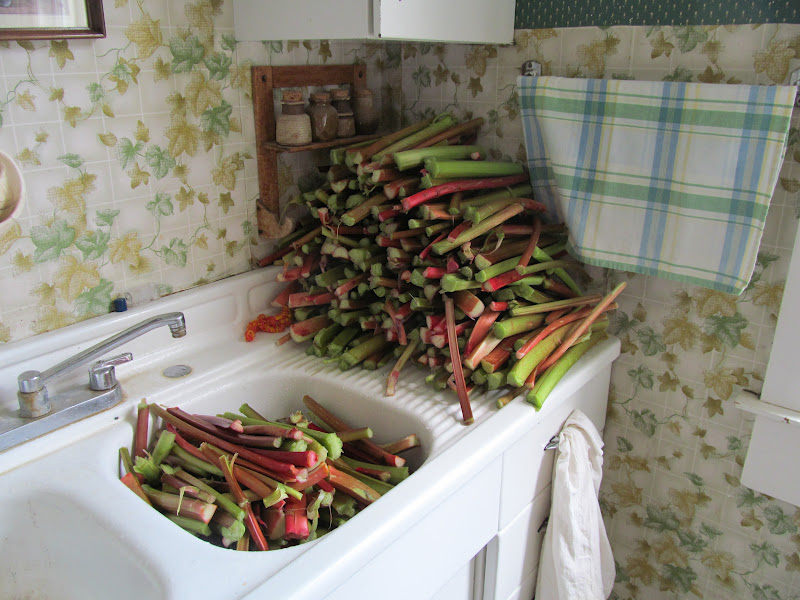
When I put up rhubarb, I start by pulling the rhubarb from the patch
It's important not to pull too much rhubarb, because then the plants will have a difficult time coming back the following year.
Then, I cut off the leaves and the bottom stems, leaving just the stalks. 


A daunting amount of rhubarb, no?
Nothing I couldn't handle! 
I then wash the rhubarb in at least two water baths, usually lukewarm water. 

The second to last step is what usually takes the longest, especially since in past years I've had to cut with not so sharp knives
But this year, I bought a new knife during my recent day trip to the Amana Colonies, and 
everything went so much faster!
(That, and I had some reinforcements later. Thanks B!) 

Once the rhubarb had been cut up, 
I measured it into plastic storage containers
And when those ran out, I switched to quart freezer bags. 

By my estimate, I put close to 200 cups in the freezer. 
Or 57 pounds based on the pictures I took. 
(Just out of curiosity, I weighed everything with the bathroom scale)

 If you find yourself in need of rhubarb sometime this summer, 
let me know! I've got plenty.

I'm excited for other fruits that I freeze to ripen
Being able to freeze everything is nice and helps me feel a little more self sustainable. 
When your freezer has rhubarb, strawberries, cherries, black raspberries, raspberries, blueberries, and mulberries, there's plenty to eat throughout the year. 
Maybe this year I'll even learn to do some canning.... 

Monday, March 5, 2012

Fantastic Fruit Pizza

 It's definitely one of the prettiest things I've ever made before...

 Fruit Pizza
1 roll of sugar cookie dough 
    {Bake as directed}

Then combine:
1 pkg cream cheese
1/3 cup sugar
1 teaspoon vanilla

Spread over the baked sugar cookie crust shortly before serving. 
Then, top with a variety of fruit!


I tried to be as creative as possible, 
using all sorts of colorful fruit

 blueberries
strawberries
grapes
mandarin oranges
kiwi


Once I had all my fruit, it was up to me to figure out a way to arrange everything. 
I did a little research  
to get some ideas about ways to start decorating
 but on the whole, my design just evolved based on the fruit I had
and the spaces I needed to fill. 
 

The best part was seeing the design evolve and incorporate even more color as I added more fruit.
 

I even thought about using bananas as another color, 
but I wouldn't have had room! 
{note the 20 grape halves from an entire carton of grapes}
 

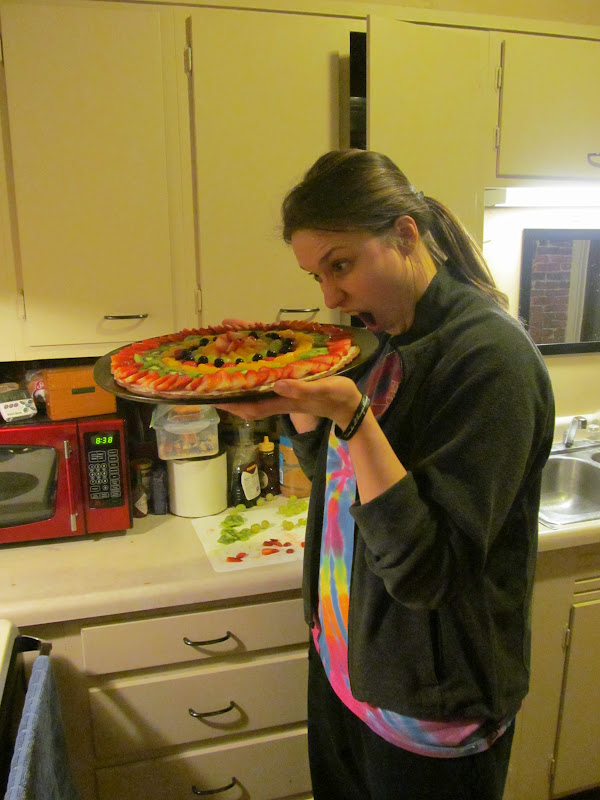
Once everything was in place, it was hard not to want a bite
 

But I made sure to curb my hunger, 
at least until I could get it to the throwdown


This pizza's definitely a colorful addition to any party.
I'm excited for the next opportunity to make one.
Both for the beauty
and the deliciousness of fruit, cream cheese, and cookie. 
{delicious}

P.S. The weekend was so full of fun that I haven't even gotten a chance to blog about spending time with my bestie Hannah and her lovely beau Adam. Any visit from her deserves a post all to itself, so keep an eye out in the next couple of days for some pictures and funny stories (though I'm sure there are some youhadtobethere moments).